This tutorial makes a 3-6 month skirt. You can adjust it to the size you need.
MADE has a great tutorial on that!
SUPPLIES:
Iron
shears
pins (not pictured)
1/3 yard Ruffle fabric (you will have oodles extra, I just didn't want to waste any, and this amount divides evenly into what your using...you can get 1/4 if you want...you'll still have oodles...but you'll have scraps...and an 1/8 isn't long enough...) ( I got mine locally at Material Girls. You can also find it
HERE, just make sure it's the mini)
1/4 yard Coordinating fabric
measuring tape
elastic
First, cut your strips of fabric. You'll need three strips of your coordinating fabric measuring 3.5'' by 9'' (which is the length of 1/4 yard.) And one additional strip measuring 5.5'' x 18''
You'll need three strips of your ruffle fabric measuring 3.5'' by about 6.5'' (or twelve ruffles)
Get your printed fabric and fold it over an inch
Press your fold down until it's nice and crisp.
Fold it over on itself
And press again.
This will be the hem on the bottom of the skirt.
Do it to all three strips.
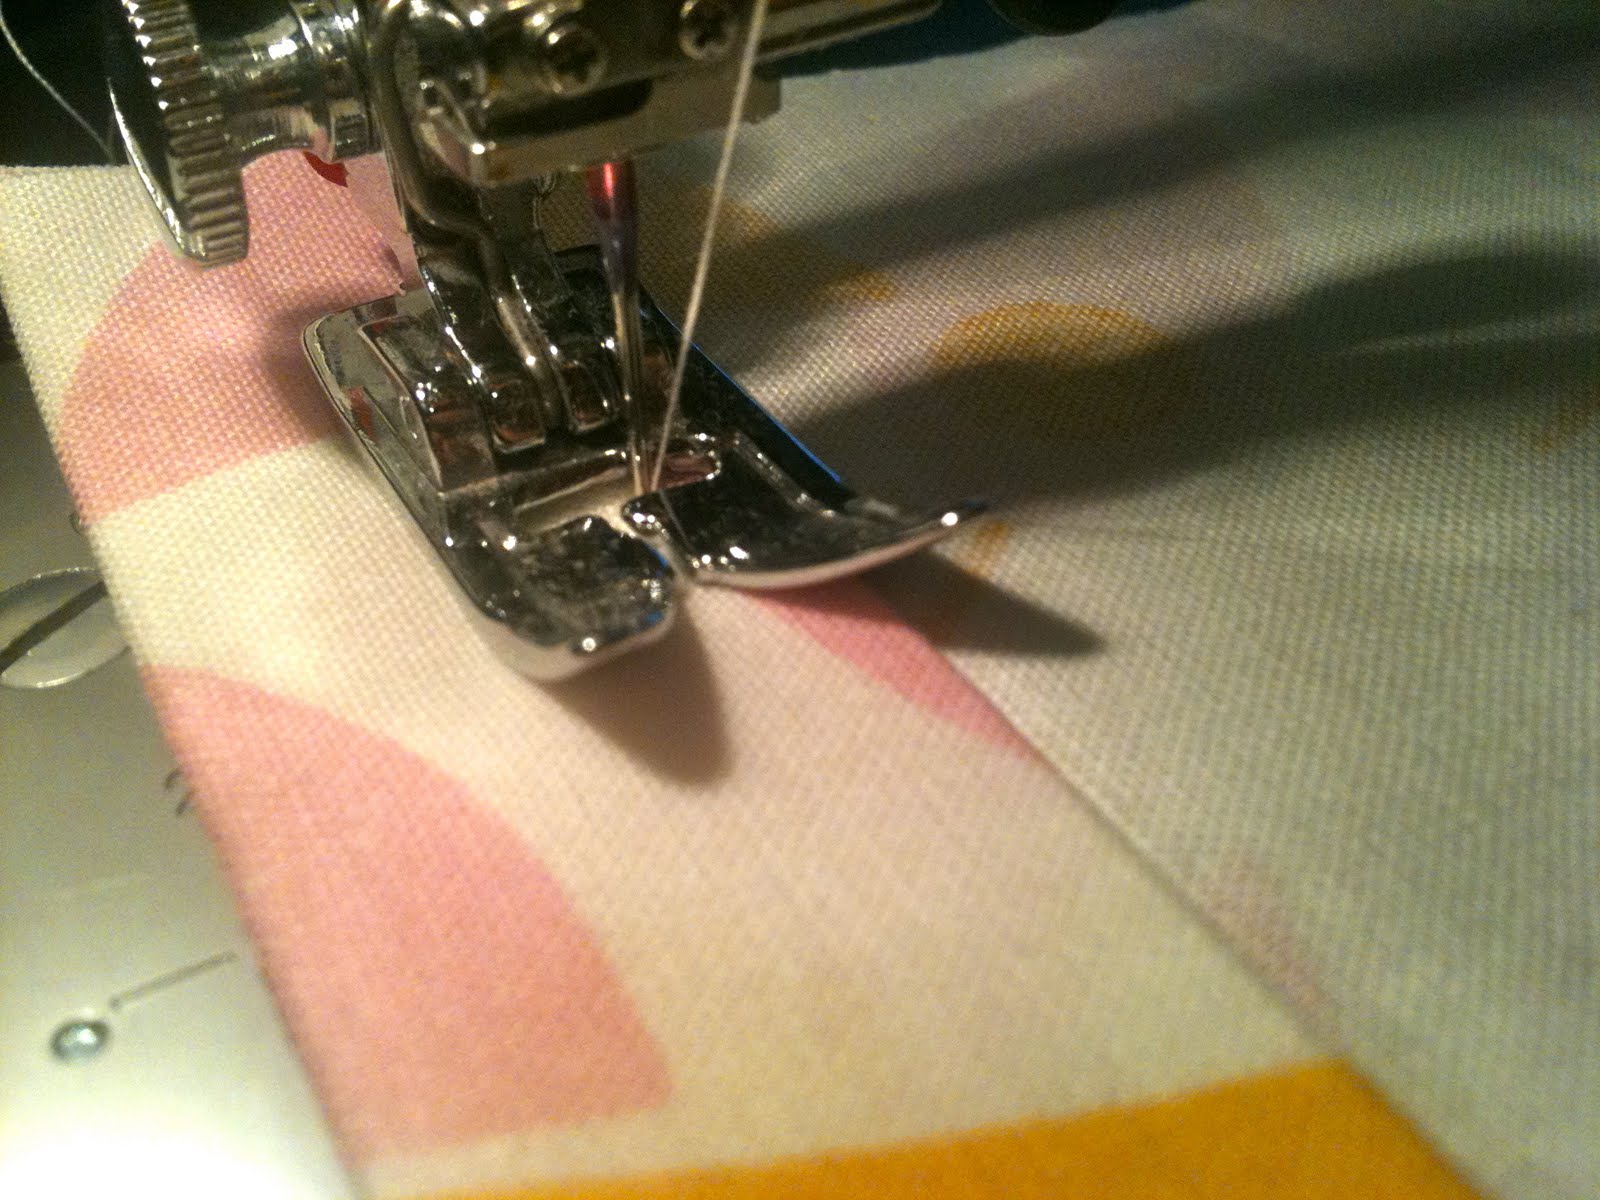
Sew down, using the inside edge of your presser foot as a guide.
Do it to all three.
Now, take a strip of your ruffle fabric...
And lay one of your hemmed pieces on top, so that right sides are together. Making sure all the ruffles are down before you sew.
Sew the two pieces together using the edge of your presser foot as a guide.
Do it to all three and you'll have this...
Take one of your new pieces,
and lay another on top, making sure right sides are together, and that ruffle fabric lays on printed.
Sew together down the side and open up to find this:
Next, take your last piece and again lay it on top, so that right sides are together and printed fabric is on ruffle fabric...
Using this picture as a guide, you'll be sewing down the left edge...
And now you should have this.....
Trim off all the tops of your printed fabric (but don't throw them away...)
And cut all your strings off..
Now, fold over in half, so that right sides are together, and seams line up.
Sew down the last edge using the edge of your pressure foot as a guide.
Turn it inside out and you should see this, ALMOST a skirt. Yay.
Now take your strip that's 5.5''x18''
Fold it in half,
and press it down.
Now open it up, and you'll see your pressed line
Take the edge of your fabric, and fold it up to your pressed "middle" line.
Press it down.
And do it to the other side..
now, fold this in half...
and press down
open back up, and fold edges over just a little bit
press down, and do it to both sides..
Take your piece and fold it over the raw edge of your skirt. Pining down where you need to. This will become the casing to your skirt...
Sew down, and stop about two inches before the end.
and you'll have this....
Take your elastic, and put a safety pin at the end. Thread it through the entire casing. Sew your elastic pieces together so that you have one entire piece. (not pictured) Then fold over the last two inches so that your elastic is completely hidden and your casing is one smooth piece. (not pictured) Sew down, to match your current seam allowance, clip all threads and you're done!!
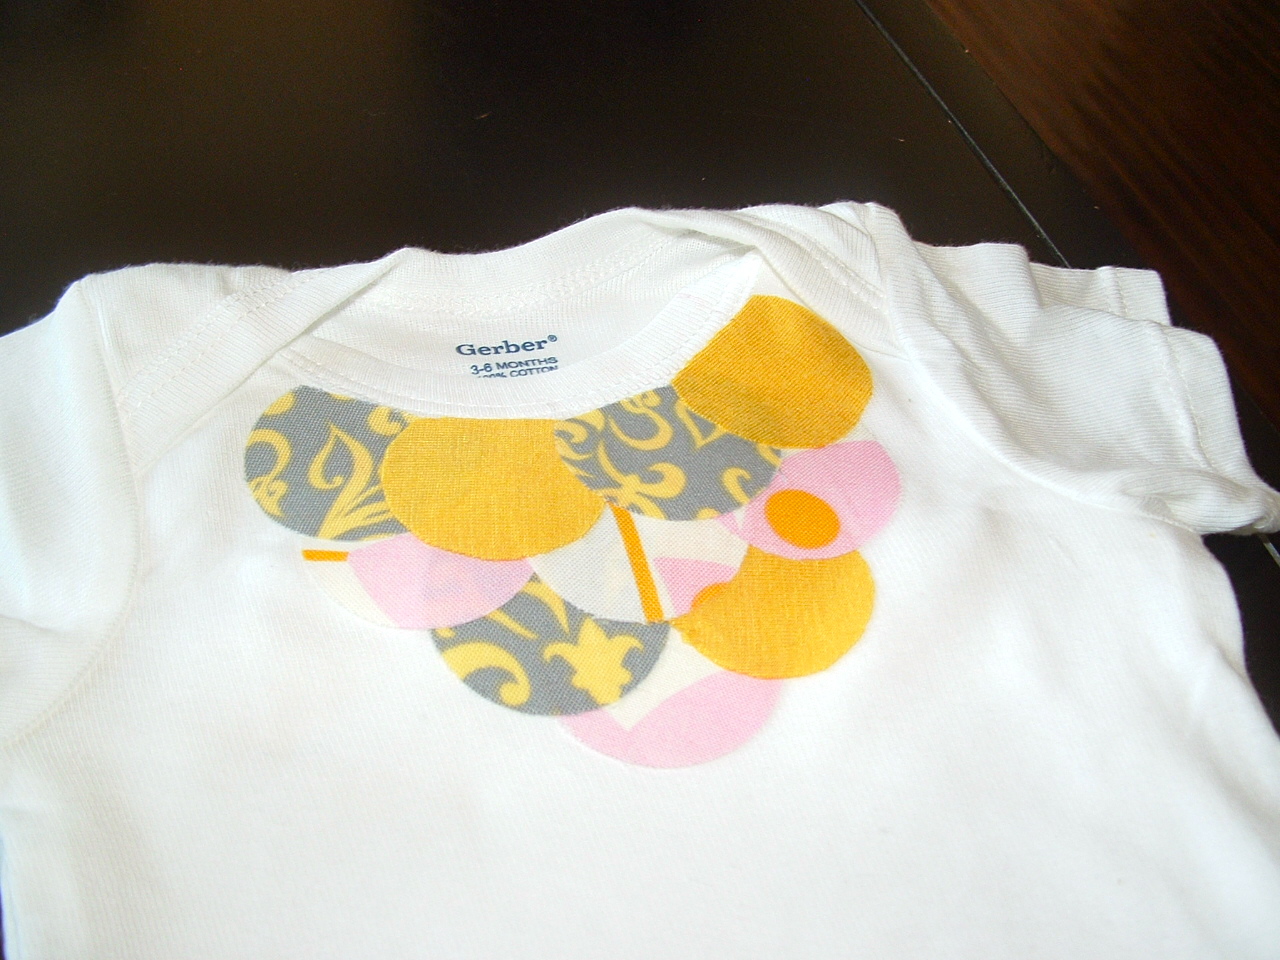
Remember these pieces? Dont throw them away! They're perfect sizes to use if you want to make circles for a coordinating onsie embellishment...or to cover buttons for a cute headband!
Happy Sewing.


No comments:
Post a Comment