I finished my jingle garland. I love the finished look with bells. Super cute.
I ordered this vinyl kit last year from Becky. You supply the plate, etching cream and labor :) It was really easy and now we have a special plate just for Santa.
This year I ordered some snowflakes to go around a mug. Santa needs milk with his cookies, so why not a special mug?
We are officially ready for tomorrow night!
And every girl needs a cute tree to put in her hair!
Thursday, December 23, 2010
Saturday, December 18, 2010
Christmas decor part 2
Before:
I got these paper mache presents at Hobby Lobby last year for $0.10 each.
After:
I made this "Noel" banner last year. But thought it was lacking.
After:
So this year I added tiny pendants between each letter, garnished with a beautiful crystal. MUCH better.
This year I made two more banners. "Believe" and "Jingle".
I embossed each frame and white backing. It's adds texture and interest. And now after using my friends cuttlebug, I have decided I will own one.
The "Jingle" is not quite complete. I still need to hang some bells off it.
3-D ornament art. I think it turned out really cute.
And now it sits by my other ornaments.
And finally some ruffled Christmas trees. I will be replacing the one in front with a beautiful white or gold...but for now this is it.
With layer upon layer of ruffles.
Wednesday, December 1, 2010
Christmas Decor part 1
Front Room:
I caved this year and got a fake tree, for the husband. with the contingency that we still get a real tree, but SMALL. so here is our sad, undecorated tree. But the lights look great.
Family Room:
Family Room:
We finally got the last pieces to complete our nativity. 6 years in the making, and totally worth it.
Stockings that my grandma makes us.I've had mine since I was a little girl. My husband got one as soon as he entered the family. And now the kids have on too!
They're so beautiful and meaningful to me.
My christmas countdown that I will re-do one day.....
Santa music players.
Where we put our cards...
Kitchen:
My sad porch. I'm in the process of weeding out all our blue/silver/white decorations. We want to stay more traditional with red's, green's, gold's, so for now our porch has on red tree (hopefully to be joined with it's taller green brother and multi wreath sister after christmas)
Tuesday, November 23, 2010
Making the perfect headband
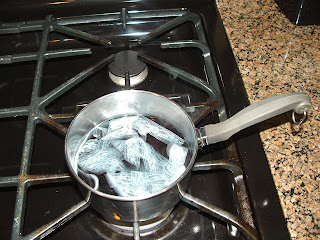
I've been making these lace poufs lately that I LOVE. Using the fun, lace, hem tape from Joanns. I decided I wanted to make matching headbands with poufs for my girls to wear for our Christmas photo..so I ran to get some lace. Unfortunately the colors didn't match perfectly..so I grabbed some white instead. Luckily RIT makes a wide variety of colors and I happened to have the specific ones at home waiting. So I gave my white lace a bath in petal pink, and pearl gray.
A closer look..
35 minuets later...aren't they beautiful?
And I think they match perfectly...
The final product.
So cute.
A closer look..
35 minuets later...aren't they beautiful?
And I think they match perfectly...
The final product.
So cute.
Thanksgiving, part 2
I almost finished everything I wanted to do for Thanksgiving... on my list was a garland for my mantel...well it turned out HUGE and doesn't fit across my mantel. So I'll make a smaller one next year...I'm not sure where this'll end up, but I loved how it turned out. You can't see the cute detail. But it really is beautiful.
I sewed crepe paper, ruffled it and formed them to make ovals. Then I cut out scalloped ovals to lay on top, and embossed them with a pretty branch design. The triangles with an empty eyelet will hold a beautiful crystal as soon as they come in the mail!
I saw this cute turkey placemat design and had to do it.....
...four times, they turned out so cute.
And for the girls...cute turkey clips that I copied from the same blog as the place mats!
And I thought how cute would that turkey be on a shirt? But with more color to match the clips? So I made one for both my girls.
And had to put this on the back.
HAPPY THANKSGIVING EVERYONE!!
I sewed crepe paper, ruffled it and formed them to make ovals. Then I cut out scalloped ovals to lay on top, and embossed them with a pretty branch design. The triangles with an empty eyelet will hold a beautiful crystal as soon as they come in the mail!
I saw this cute turkey placemat design and had to do it.....
...four times, they turned out so cute.
And for the girls...cute turkey clips that I copied from the same blog as the place mats!
And I thought how cute would that turkey be on a shirt? But with more color to match the clips? So I made one for both my girls.
And had to put this on the back.
HAPPY THANKSGIVING EVERYONE!!
Labels:
clips,
freezer paper paint,
paper crafts,
sewing,
Thanksgiving
Subscribe to:
Posts (Atom)