
Showing posts with label paper crafts. Show all posts
Showing posts with label paper crafts. Show all posts
Friday, January 21, 2011
Paper globes
A few posts ago I had my cute topiaries and puff felt balls. I didn't love the way they (puff balls) looked hanging on my hooks. So I changed them up a bit....and decided, I did in fact need something hanging. Enter Heather Bailey's paper globe pattern. I did the circles a little smaller on my gypsy to get more out of a page. And it still worked beautifully. I absolutely LOVE them. Much better than the previous occupants.

Tuesday, January 18, 2011
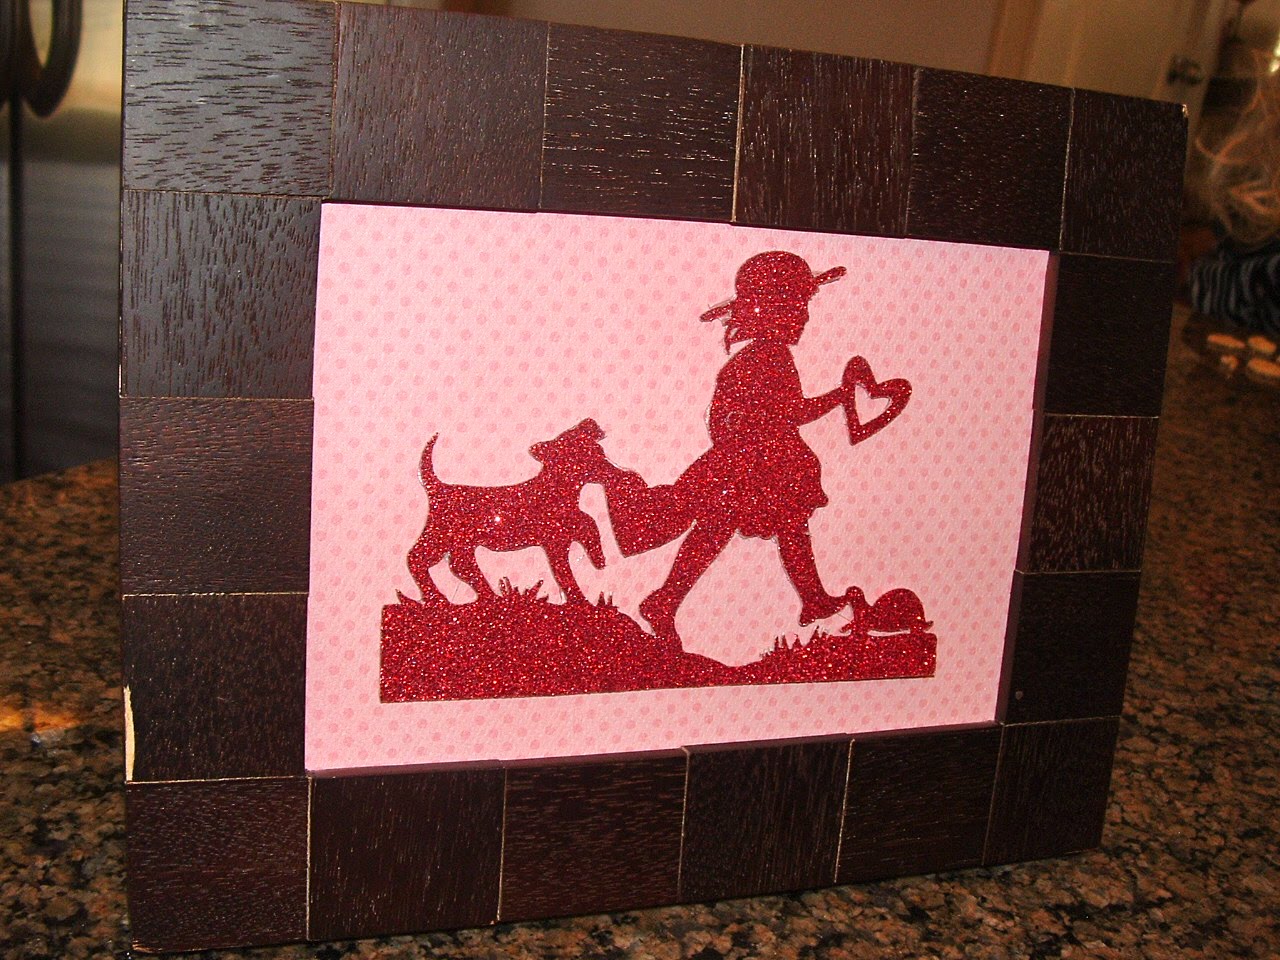
Framed valentine art
More decorations. And more copying. This is my version of an insect heart display.
 Framed conversation hearts, heart.
 Love sign, inspired by this. I like the red and black more. But it just doesn't go with the rest of my decor.
 Simple and cute silhouettes. Compliments of my Cricut, "A Child's Year" cartridge, and snazzy glitter paper.


 Framed conversation hearts, heart.
 Love sign, inspired by this. I like the red and black more. But it just doesn't go with the rest of my decor.
 Simple and cute silhouettes. Compliments of my Cricut, "A Child's Year" cartridge, and snazzy glitter paper.
Saturday, December 18, 2010
Christmas decor part 2
Before:
I got these paper mache presents at Hobby Lobby last year for $0.10 each.


I got these paper mache presents at Hobby Lobby last year for $0.10 each.

After:
This year I covered them with cute paper.
 Before:
 Before:
I made this "Noel" banner last year. But thought it was lacking.

After:
So this year I added tiny pendants between each letter, garnished with a beautiful crystal. MUCH better.

 This year I made two more banners. "Believe" and "Jingle".
 I embossed each frame and white backing. It's adds texture and interest. And now after using my friends cuttlebug, I have decided I will own one.
 The "Jingle" is not quite complete. I still need to hang some bells off it.
 3-D ornament art. I think it turned out really cute.
 And now it sits by my other ornaments.
 And finally some ruffled Christmas trees. I will be replacing the one in front with a beautiful white or gold...but for now this is it.
 With layer upon layer of ruffles.
Tuesday, November 23, 2010
Thanksgiving, part 2
I almost finished everything I wanted to do for Thanksgiving... on my list was a garland for my mantel...well it turned out HUGE and doesn't fit across my mantel. So I'll make a smaller one next year...I'm not sure where this'll end up, but I loved how it turned out. You can't see the cute detail. But it really is beautiful.
 I sewed crepe paper, ruffled it and formed them to make ovals. Then I cut out scalloped ovals to lay on top, and embossed them with a pretty branch design. The triangles with an empty eyelet will hold a beautiful crystal as soon as they come in the mail!
 I saw this cute turkey placemat design and had to do it.....

 ...four times, they turned out so cute.
 And for the girls...cute turkey clips that I copied from the same blog as the place mats!
 And I thought how cute would that turkey be on a shirt? But with more color to match the clips? So I made one for both my girls.

 And had to put this on the back.
 HAPPY THANKSGIVING EVERYONE!!
 I sewed crepe paper, ruffled it and formed them to make ovals. Then I cut out scalloped ovals to lay on top, and embossed them with a pretty branch design. The triangles with an empty eyelet will hold a beautiful crystal as soon as they come in the mail!
  I saw this cute turkey placemat design and had to do it.....
 ...four times, they turned out so cute.
  And for the girls...cute turkey clips that I copied from the same blog as the place mats!
  And I thought how cute would that turkey be on a shirt? But with more color to match the clips? So I made one for both my girls.
 And had to put this on the back.
 HAPPY THANKSGIVING EVERYONE!!
Sunday, November 21, 2010
Thanksgiving, part 1
I've never really decorated for Thanksgiving! I know...but my sweet mother in law started giving us a little decoration for each holiday a couple years ago, and so the decorating bug bit me. I usually just leave all the pumpkin stuff out from Halloween, but I wanted to do a little bit more than that.
I made this cute sign last year. The other side says "Halloween" and I just flip it depending on the holiday. It's all paper cut outs on a thin, extra, wood strip I had in the basement. I mod-podged it all and it does really well in the moisture. Although I don't love the look with snow..it's not really fall-y.
 I made a simple "harvest" garland..nothing fancy. And printed off these cute sayings from another fellow blogger.
 I made these cute stands with supplies from the D.I. The bowl cost $1.00 and $0.50 for the base. It was a cheap gold candle stick. I cleaned of the thick layer of wax, sprayed it cream, and attached it to the bowl with silicone.
 Same with this one. Prices and all. This candlestick was white with two blue strips and blue speckles. And then a picture of a chicken in the center. Very country, very old school. Well, a couple layers of spray paint and you get this...
 And I filled it with faux leaves and these cute, SUPER easy pumpkins.
 Another printable. And a turkey silhouette by me.
 Fall leaves. I'm not in love with it though...it will probably change next year.

 Smaller turkey on painted wood scrap with cute paper backing. And cute pumpkin paper on another wood scrap with ribbon.
 And the beautiful plate my mother in law gave me that started it all....

 I made a simple "harvest" garland..nothing fancy. And printed off these cute sayings from another fellow blogger.
 I made these cute stands with supplies from the D.I. The bowl cost $1.00 and $0.50 for the base. It was a cheap gold candle stick. I cleaned of the thick layer of wax, sprayed it cream, and attached it to the bowl with silicone.
  Same with this one. Prices and all. This candlestick was white with two blue strips and blue speckles. And then a picture of a chicken in the center. Very country, very old school. Well, a couple layers of spray paint and you get this...
 And I filled it with faux leaves and these cute, SUPER easy pumpkins.
 Another printable. And a turkey silhouette by me.
 Fall leaves. I'm not in love with it though...it will probably change next year.
 Smaller turkey on painted wood scrap with cute paper backing. And cute pumpkin paper on another wood scrap with ribbon.
 And the beautiful plate my mother in law gave me that started it all....
Tuesday, October 5, 2010
Halloween Bags
I FINALLY finished. I made my older daughter, Aubree, this cute bag for trick or treating (with the never ending patience and teachings of my cute Aunt...) and I knew I wanted to make one for her little sister, when she was able to use it. I bought enough paper ahead of time. A few months ago, I realized that my younger daughter, Sophie, would in fact be actively participating in Halloween this year. So I had to make her bag too.
And they turned out SO cute.
 A spider for Aubs.
 A witch for Soph. ( I think I need to move "p" down. It's driving me crazy!)
 The edges are all sewn together with boondoggle. And I love the detail.
 I made they're bags matching, in opposites.
 With coordinating paper on the sides. They love them and use them a lot more than just for Halloween. Now I need to make them more themes so I can change out the papers and get more use out of it.
 I'm thinking of using it for
 Valentines Day
Easter
And a non holiday theme for church and the library...
Gifts for nieces
I did these a while ago and just now found the pictures!
For my nieces birthday I decided to make them some personalized items..
For my nieces birthday I decided to make them some personalized items..
A covered note book (inspired by the ones I did for the girls church books) with their initial on it. I used their favorite color and added buttons to spruce it up. Then I sewed elastic to the inside back cover, so they could keep it closed if wanted...
 Then I made them lounge pants. My older Niece Tori LOVES owls. (The same one I did little notebooks with) So I free-handed a stencil with freezer paper and painted an owl on, then I used fabric to give it more texture and detail.
 On the back I put her name. (Using the cricut to cut out the letter stencil)
 My younger niece.
 She LOVES monkey's so I came up with this for her pant.
 I didn't take pictures of the rest..but I think they really liked it.
Monday, October 4, 2010
Baby Kai
My sil had a baby boy (so jealous) and her Mom wanted me to make her something cute to display at her shower. The nice thing was she bought all the supplies for me, and all I had to do was assemble!
So she got a cute diaper cake in blues and browns..
 And a cute sign to match his room.

 First grandson! We're so excited!
 And a cute sign to match his room.
 First grandson! We're so excited!
Subscribe to:
Posts (Atom)